Setting the homepage and blog
Setting the homepage and blog is easy with Campaign Pro. You can even add content to the blog index, making it look and feel just like the rest of your site.
In this section:
- Overview of the “blog index”
- Create the page you want to use as your blog index
- Create the page to use as your homepage
- Set the homepage and blog index
1. Overview of the “blog index”
The blog index is the page that displays all of your blog posts in reverse chronological order (like on our site, here). It’s sort of the main “hub” of your blog.
When you initially install WordPress the blog index will be the homepage, but unless your site is exclusively a blog, you’ll likely want to set a different page as the blog index.
2. Create the page you want to use as your blog index
With Campaign Pro you can customise the look and feel of the blog index without writing any code or fiddling about with template files, allowing you to manage it just like the rest of your site.
Create the page that you want to use as your blog index. Add content to it as you would any other page. Title it “Blog,” “News,” “Articles,” or an appropriate name and when you’re happy, publish the page.
3. Create the page to use as your homepage
If you haven’t done so already, create the page that you want to use for your homepage. Remember that this will be the page that most of your site visitors will see, and is the “shop window” to your site, so spend a bit of time crafting a good ‘un.
4. Set the homepage and blog index
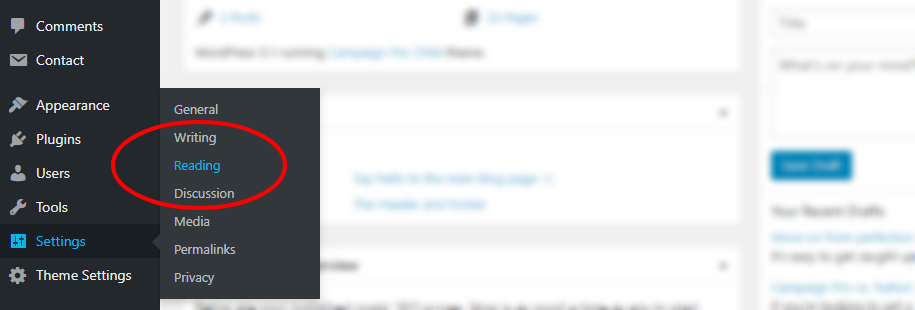
With the homepage and blog index pages created, it’s simply a case of setting them by going to Settings >> Reading.
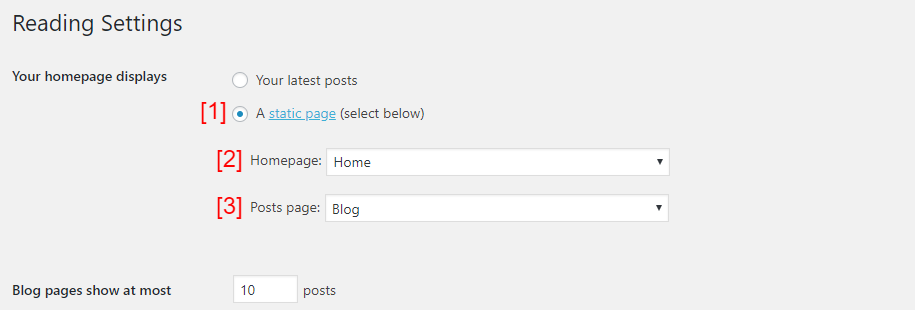
You’ll now be on the “Reading Settings” page. Check the A static page [1] radio, choose your homepage [2] and choose your posts page [3] and click Update and your pages will then be set.
And that’s it! You’ve now set your homepage and blog. Enjoy 🙂