Downloading and installing
Downloading and installing Campaign Pro takes just a few minutes and is a simple and streamlined process – read on for some helpful info on getting set up in no time.
1. Download Campaign Pro
Once you’ve purchased Campaign Pro you’ll receive an email, this email will probably be the best email you’ve ever received, because it’ll contain your download link for Campaign Pro, simply click the link and your download will begin.
…or alternatively sign up for the cloud version. Plans start at $0.00.
2. Install Campaign Pro (and child theme)
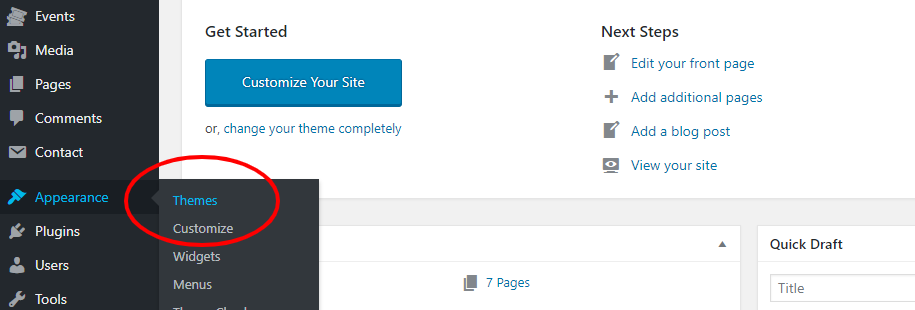
Head over to the site you want to install Campaign Pro on and go to Appearance >> Themes.
Once on the Themes page click Add New (at the top), and then click Upload Theme [1], click Choose File [2] and browse to the file you downloaded (campaign-pro.zip) and click Install Now [3].

Voilà, Campaign Pro is installed!
Simply click activate and Campaign Pro will be up and running. Install the child theme as well (campaign-pro-child.zip) by following the same steps as above.
3. Install plugins
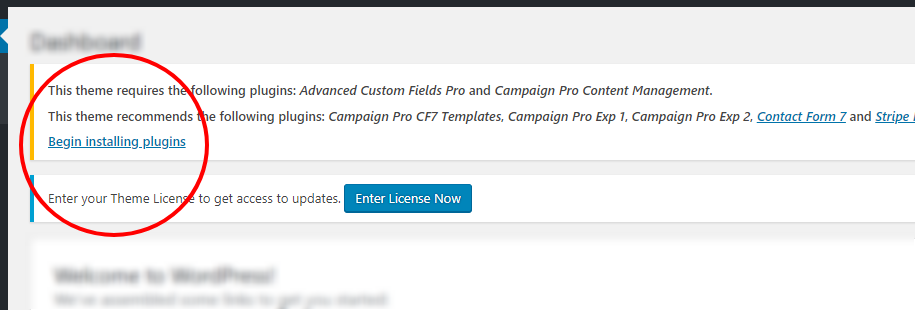
You’ll see a message at the top of the screen which lists the plugins to install. Advanced Custom Fields Pro and Campaign Pro Content Management must be installed, the other plugins are optional (although it’s recommended to install them).
Click begin installing plugins to go to the installation screen.
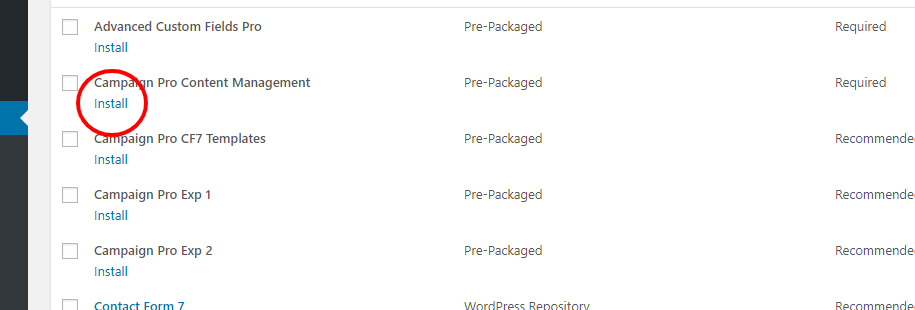
Once you’re on the installation screen, you’ll see the list of plugins. All of the Campaign Pro plugins (there’s 4 of them) come bundled with the theme, and Contact Form 7 and Stripe Payments will be downloaded straight from the WordPress repository.
Click install under each plugin.
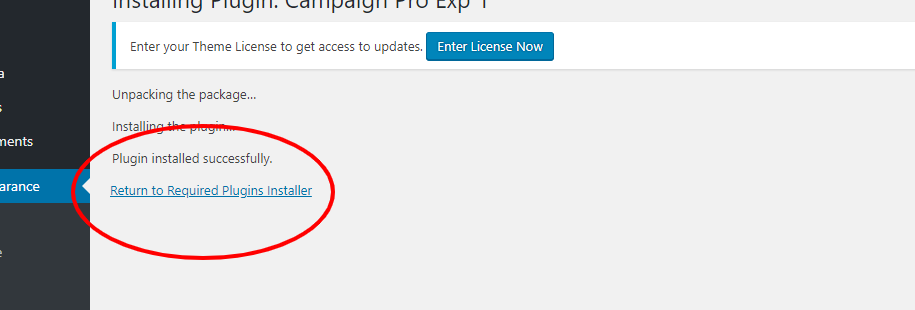
When you click install you’ll be taken to a screen that looks like the one below, confirming that the plugin has been installed. Simply click return to required plugins installer to go back to the list of plugins, and do the same for the rest of the plugins.
Once all the plugins are installed, you’ll see Activate under the plugin name, simply click this for each plugin and the plugins will be ready to go.
4. Activate licence
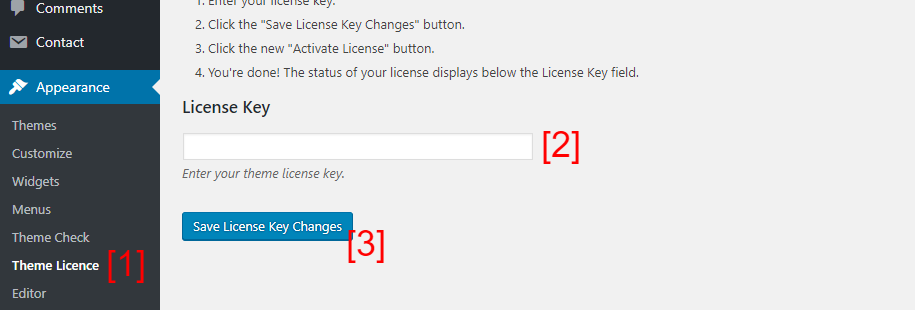
Activate your theme licence, so you can get access to updates and support, by going to Appearance >> Theme Licence [1], entering your Licence Key [2] and clicking Save Licence Key Changes [3].
Before you enter your licence key there will be a message at the top of the screen which you can click to go to the licence screen. Now you’ll have access to theme updates, ensuring you have the latest performance and security updates.